 Steps - System Settings Setup Steps - System Settings Setup
| 1. | System
 System Maintenance
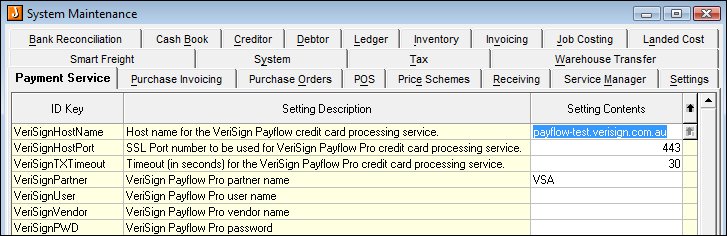
Payment Service Tab - enter the details received from Verisign. System Maintenance
Payment Service Tab - enter the details received from Verisign.
|
|
|
|
|
| 2. |
System
|
| UsePaymentTypeBankAccount - Tick to use the bank account attached to the various payment types. ApplyWarehouseMaskToBankAccount – Tick if required (provides for masking depending on the active warehouse). WarnWhenCCPaymentExceedsTotalOrder – Tick to warn the user when the credit card payment they have entered is going to cause total payments to exceed the order total (i.e.: they will be over-paying the invoice) | |
|
|
Steps - Payment Types Setup| 1. | Debtors
 Configuration
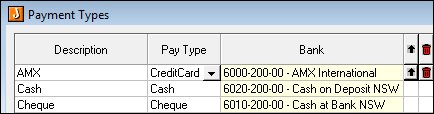
Maintain Payment Types - ledger accounts to be entered against the various payment types.
Configuration
Maintain Payment Types - ledger accounts to be entered against the various payment types.
|
|
|
|
Copyright © 2012 Jiwa Financials. All rights reserved.
 Change the VerisignHostName from “payflow-test.verisign.com.au” to “payflow.verisign.com.au” when going live. The Port specified in the VerisignHostPort setting must be opened in the firewall.